

How To Plant Seeds In My Garden?
Eugene is an avid gardener and has been passionate about growing things for over 40 years.
Growing Plants From Seed
You can buy "ready made" plants in a store, but it can be much more fun and a lot less expensive to grow them yourself from seed. The magical phenomenon of a seed's germination and transformation into an adult plant is entertaining for both adults and children alike!
In this guide we'll discuss
- Collecting seeds (from poppies)
- Trays and other containers for sowing seeds in.
- Which growing medium is best
- Details on sowing seeds
- How you should look after seeds once they're sown
- Getting ready for planting out
- What are the easiest plants to grow
- Seed germination and seedling problems
Is it easy to grow plants from seeds?
Seed sowing is a basic horticultural skill. Many flowers, trees, and vegetables are easy to grow from seed if you take a little bit of care. Minimal equipment is needed and all you need to do is provide the basic requirements for germination; warmth, moisture and oxygen.
One obvious advantage of growing plants from seed is that it is much cheaper than buying them. Also many plants produce lots of seeds which can easily be harvested and sown, and you can collect more seeds than would ever be included in a store-bought packet.
What you'll need:
- the seeds themselves
- containers: you can use discarded plastic cups, trays or boxes
- seed compost (potting soil made especially for starting seeds)
- a spray mister (empty spray bottles are ideal)
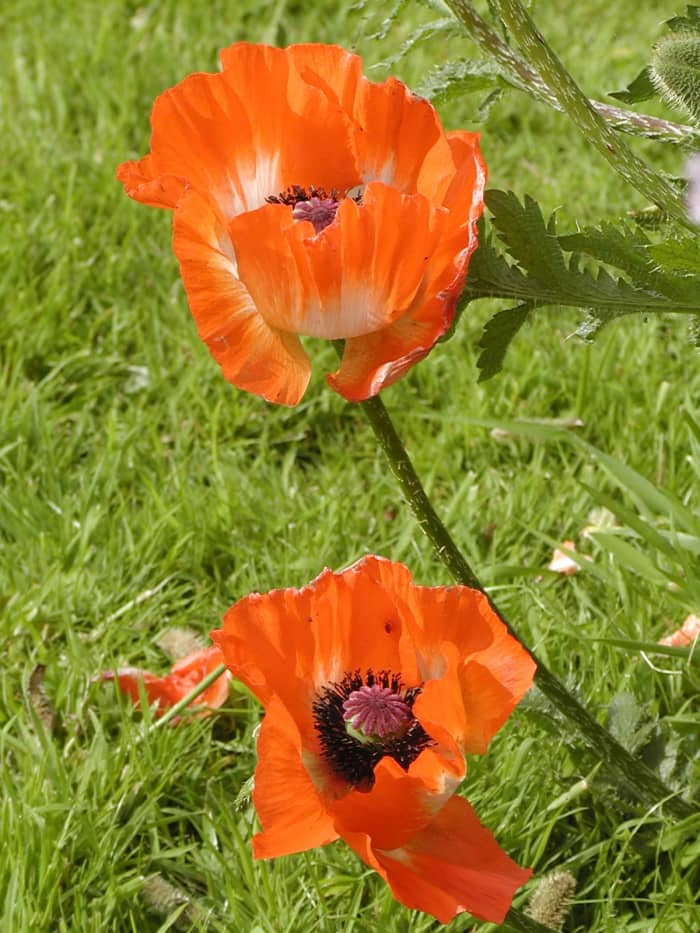
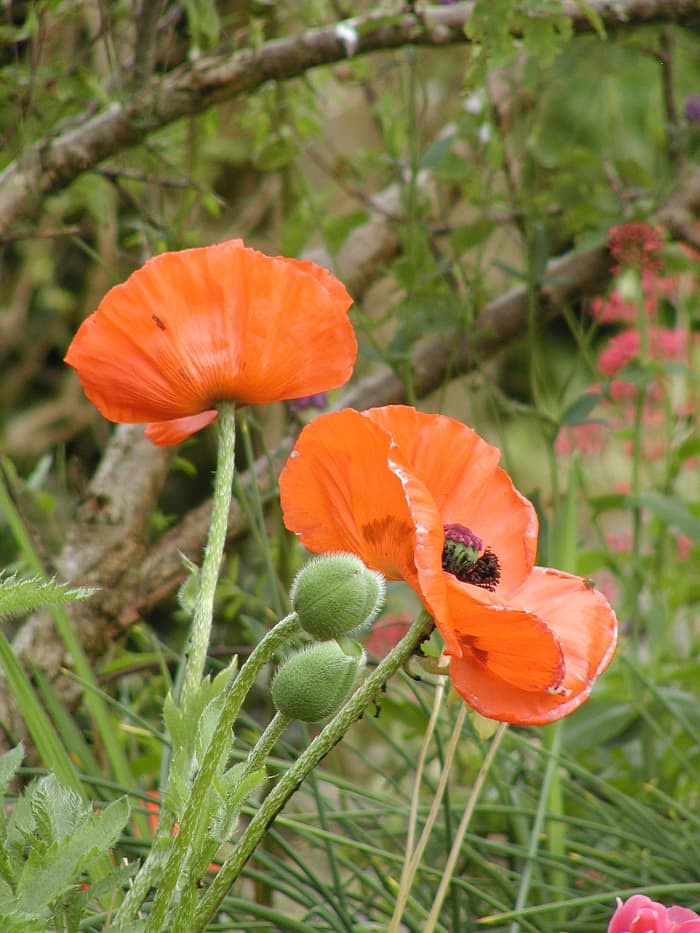
Oriental poppies: I harvested seeds from these in the late summer.
© Eugene Brennan
Steps for Sowing
These are the basic steps, but check the seed packet for specific details on sowing depth, germination temperature and when to sow.
Step 1: Harvest Seeds From Flowers and Vegetables
The seeds I sowed were collected or harvested from flowers in the autumn after flowering.
- Pick a dry day for collection.
- Shake seeds into a paper bag or envelope (not a plastic bag, which will retain moisture and promote mold). Some plants have pods which are just another shape of ovary. You can split these open yourself and collect the seeds, but some pods are "spring loaded" and twist and split open themselves, flinging seed everywhere, so collect those seed before this happens.
- Store seeds in a cool, dry place until you're ready to sow them.
When are seeds ready to be collected?
Collect seeds when the ovaries (seed pods) are ripe. You'll know this because they'll usually have become crisp, dried-out, and beige in color. Sometimes, with plants like marigolds, the ovary will split open, revealing bunches of seeds. Other flowers have a capsule-like ovary. A tell-tale sign that seeds are ready is that you can hear them rattle inside when you shake the seed pod.
Will flowers grown from seed be like their parents?
Not necessarily. Flower varieties are often bred to have certain attributes such as large, abundant or colorful blooms or nicely shaped petals. Quite often if you sow seeds, the flowers produced will revert to what the original wild version looked like. We'll learn more about this later.
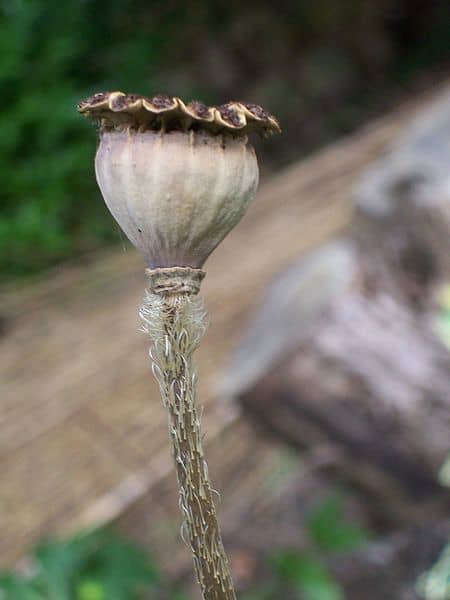
Seed-containing ovary of a poppy plant. Seeds can be harvested on a dry day when pods have lost their green color and dried out.
Pavot, Attribution-Share Alike 2.0 Generic via Wikimedia Commons
Step 2: Collect Trays or Pots and Drill Holes If Needed
You can sow seeds in a proper seed tray bought from a store. Alternatively, you can make do with a cookie tin, flower pot, empty food container, or something like that. If there are no holes in the bottom of the container, make some with a 1/4 inch drill bit or a nail. Space the holes a few inches apart. This allows water to drain from the container and prevents it from collecting, which would make the seed compost overly wet.
You can also sow seeds individually in plant trays like the ones annual plants from stores are sold in. The advantage of these is that seedlings don't need to be transplanted later. If you have lots of seeds and not enough trays, sow a couple in each compartment in the tray in case one doesn't germinate.
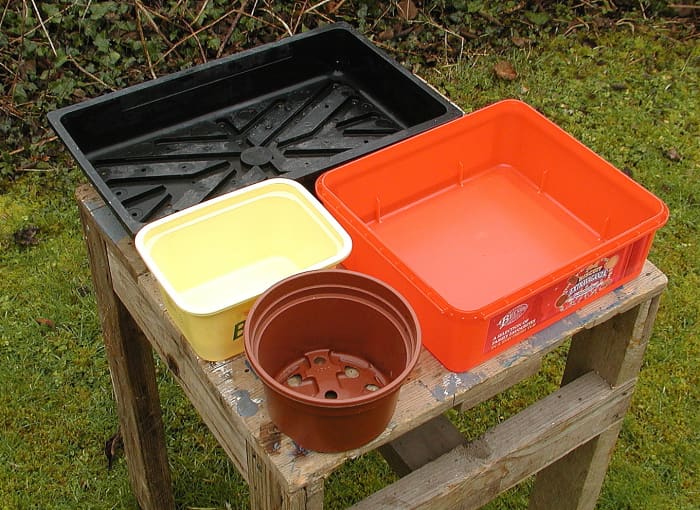
Many containers can be used for sowing seeds. Add holes for drainage.
© Eugene Brennan
Step 3: Fill the Container With Sterile Seed Compost (Seed-Starting Potting Mix)
Use a sterile seed compost like this seed starting potting mix from Amazon if possible. You can also use a multipurpose seed/potting compost, but don't use soil dug up from your garden, as this will be lumpy, contain lots of pests and diseases, and dry out quickly. Some plants aren't "fussy" about what they grow in, and if you have lots of harvested seed, you can try sowing it in soil which you have crumbled up so that it's nice and fine. From my experience however, it's best to buy proper compost to maximize the chances of germination.
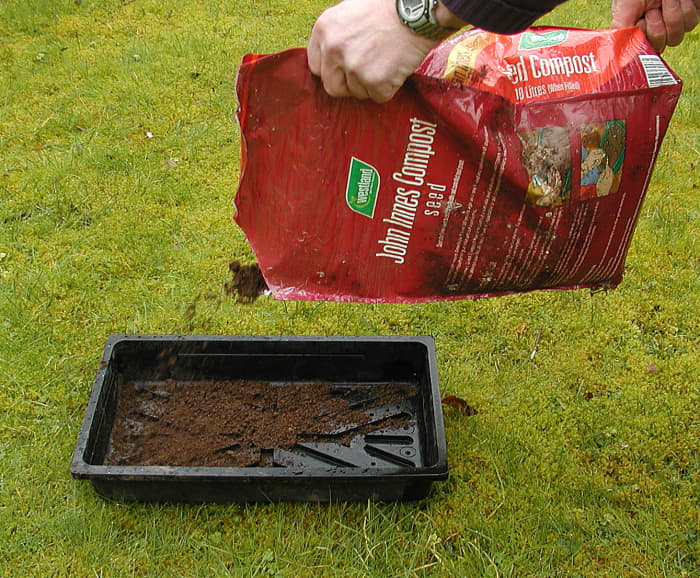
Fill the seed tray with seed compost.
© Eugene Brennan
Read More From Dengarden

The seed tray doesn't need to be totally filled because seedlings will eventually be transplanted.
© Eugene Brennan
Step 4: Moisten the Surface of the Compost
Moisten the surface of the compost with a mist spray. I just use an empty recycled window or shower cleaner bottle (carefully washed out before using). You can use a watering can but unless its sprinkler rose has small holes, it will flood the compost. Don't use a watering can to wet the compost pre-germination if it becomes dry, or to water delicate young seedlings, because too much water will wash away seeds or flatten seedlings.

Wet the surface of the soil with a mister. Mine was recycled and cleaned thoroughly.
© Eugene Brennan
Step 5: Sprinkle the Seeds Evenly Over the Compost
Sprinkle small seeds over the compost from the palm of your hand using your finger. Don't cover small seeds with soil, as it can smother them. Larger seeds can be placed one by one on the compost and then covered with a sprinkling of compost. Much larger seeds (such as sweet corn, sunflowers, and tree nuts) can be pushed down below the surface of the compost about 1/4" / 6 mm.
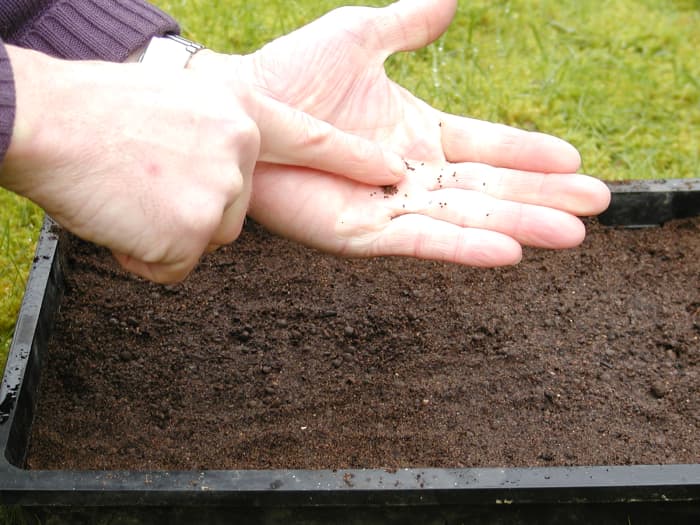
Sprinkle seeds evenly over the compost surface. Small seeds don't need to be covered. Larger seeds can be covered with a thin layer of compost.
© Eugene Brennan
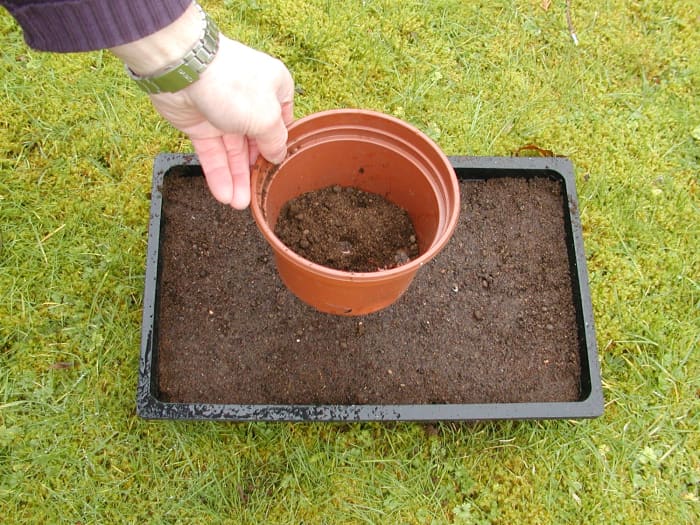
Larger seeds can be covered with a thin layer of compost. A flower pot acts like a pepper pot and is useful for sprinkling compost
© Eugene Brennan
Step 6: Cover the Seed Tray and Place It in a Warm Spot
Cover the seed tray with a piece of glass, a magazine, a slate, a piece of plastic, plywood or whatever. This prevents the compost from drying out and keeps the seeds in the dark, which aids germination. However seeds may alternatively require diffuse light for germination, so again, consult the seed packet or Google for specific details.
Seeds sprout best at a temperature above 64F (18C). In the northern hemisphere, it's best to sow seeds in early spring around February or March so the plants can have a full growing season. If you live in a climate with cold winters, it may be too cool for germination, so you can place the tray in a plant propagator (or alternatively locate it in a hot press close to a hot water tank or near your furnace/boiler).
Check the seed tray after a couple days, and then keep checking it for signs of germination. The trick is catching them in time: some seeds sprout quite quickly (within days) while others take weeks.
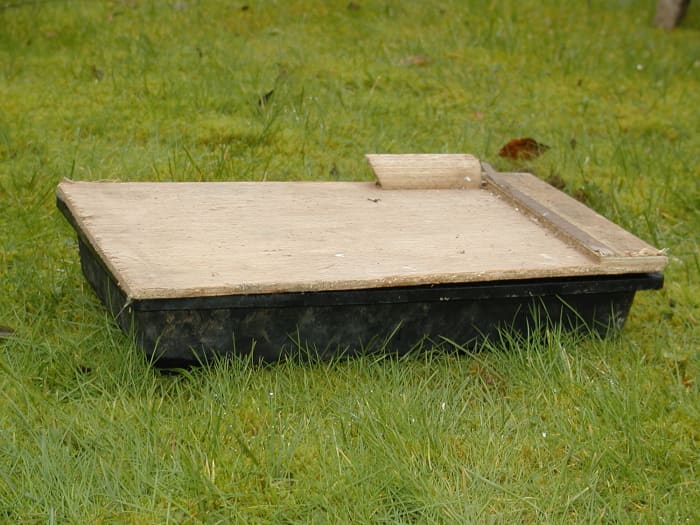
Cover the seed tray. I used a scrap piece of thin plywood which worked nicely.
© Eugene Brennan
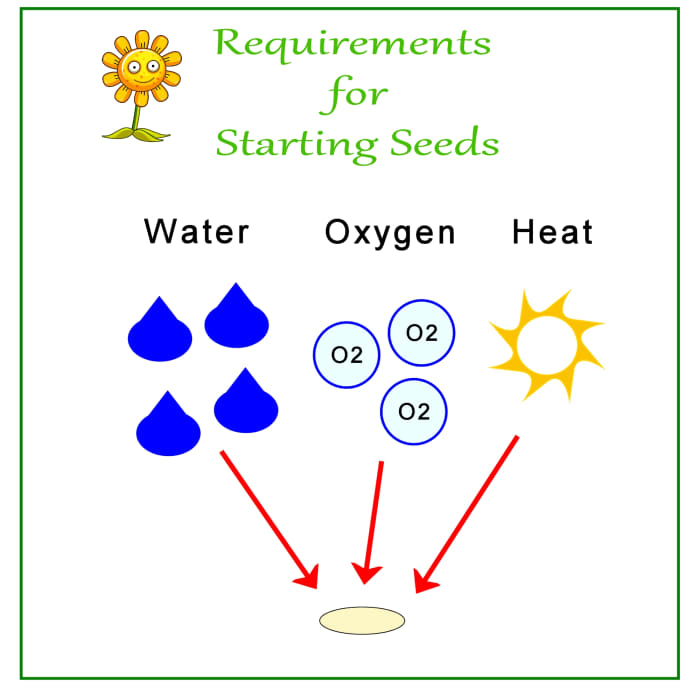
Requirements for seed germination.
© Eugene Brennan
Step 8: Uncover the Seedlings Once They Germinate
It's very important to uncover the seedlings and expose them to light once they germinate, otherwise they will rapidly become straggly, with overly long, thin stems.
- If the plants are sensitive to frost, they will need to be kept indoors in full sun, in a greenhouse, or under a cold frame. During severe frosts, seed trays should be brought indoors or covered with insulation to protect them from freezing.
- Place the seed tray on a windowsill where it should get enough light.
- Turn the tray each day so the seedlings are evenly lit.
- Keep the compost moist with a spray mister. This is essential, especially if the seeds are at or close to the surface, as those tiny roots can dry out rapidly when exposed to warm sunshine or warm air in a room.
- Check daily and water if necessary. Once seedlings have a few pairs of "true leaves," they're ready for the next step.
Tip: Avoid strong sunshine on trays of small seeds sown outdoors. The surface of compost can rapidly dry out, especially if it's windy, and the seedlings may perish. It's probably best to keep them out of direct sunlight until a few pairs of leaves appear.
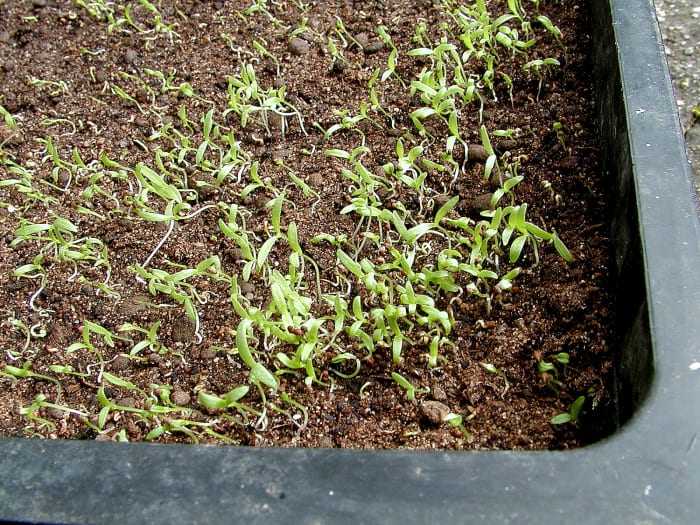
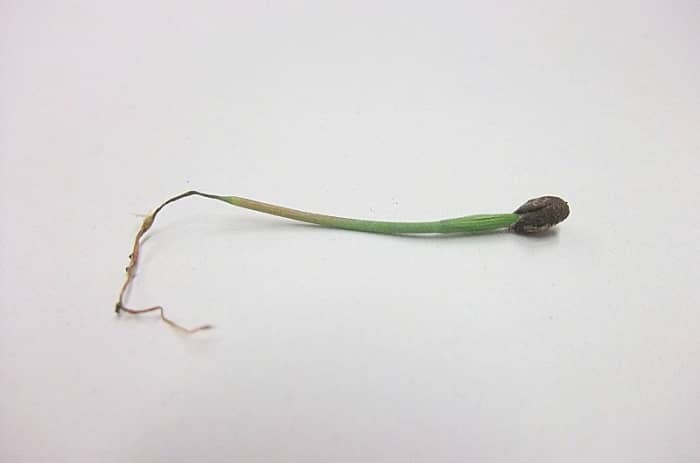
The seeds germinated after about a week and reached this size after 18 days.
© Eugene Brennan
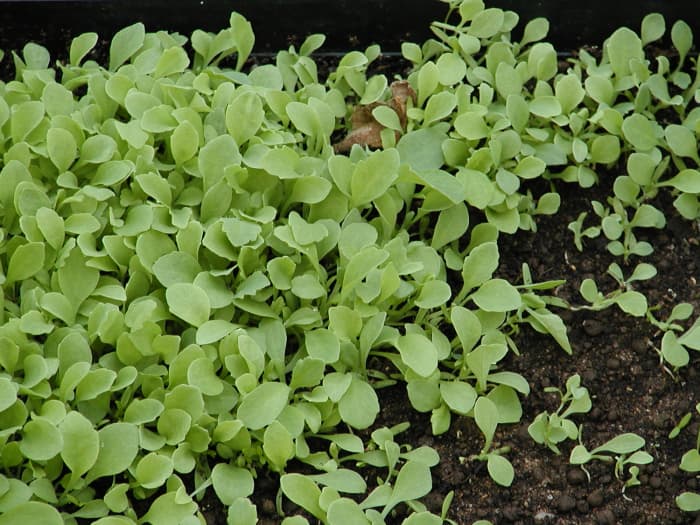
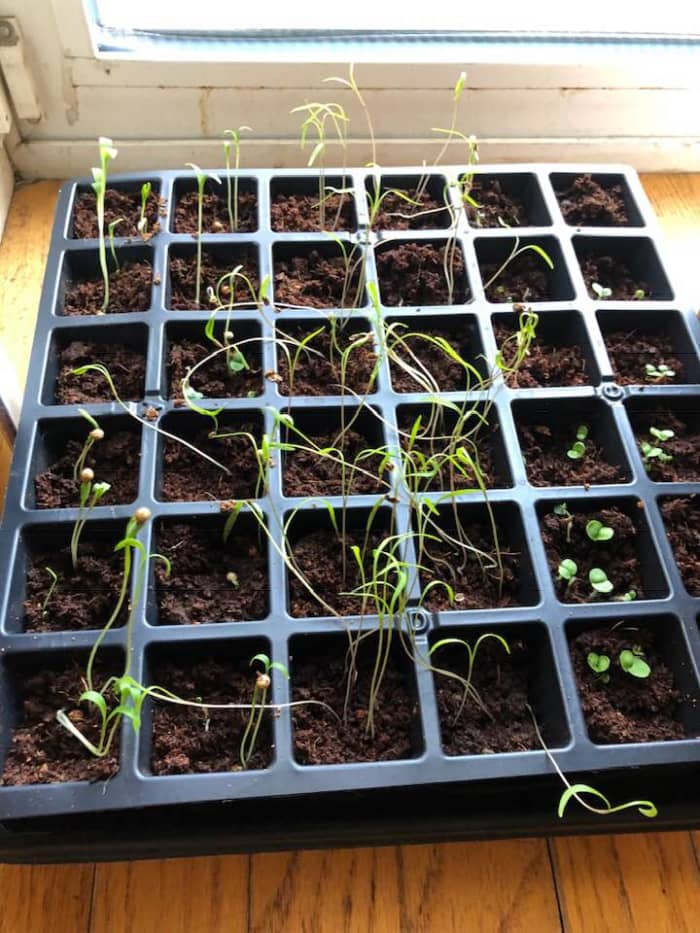
43 days after sowing: Looks like I sowed the seed too thickly! It's always a dilemma if you have a lot of seed whether to sow some or all. If you only sow a few seeds, none of them may germinate. The alternative is everything comes up!
© Eugene Brennan
Step 8: Transplant the Seedlings to Individual Pots
Once seedlings have grown a few pairs of "true leaves" and are big enough to handle without damage, they can be transplanted into individual pots or trays. Some seedlings are quite small and delicate, so it's best to wait until they get bigger.
- Water to loosen the compost and then gently tease the seedlings out using a popsicle (ice pop) stick, teaspoon, or similar. Try to avoid damaging the delicate roots.
- If seedlings are small, it's best to hold the leaves between your fingers and pull sideways to disentangle the roots from adjacent plants rather than pulling upwards, which can cause breakage.
- In the new pot, make a hole a with your finger or the popsicle stick in the compost, drop the seedling into the hole, and gently press the compost back around the roots.
This guide shows you how to make your own compost:
Gardening for Beginners: Composting Without a Compost Bin
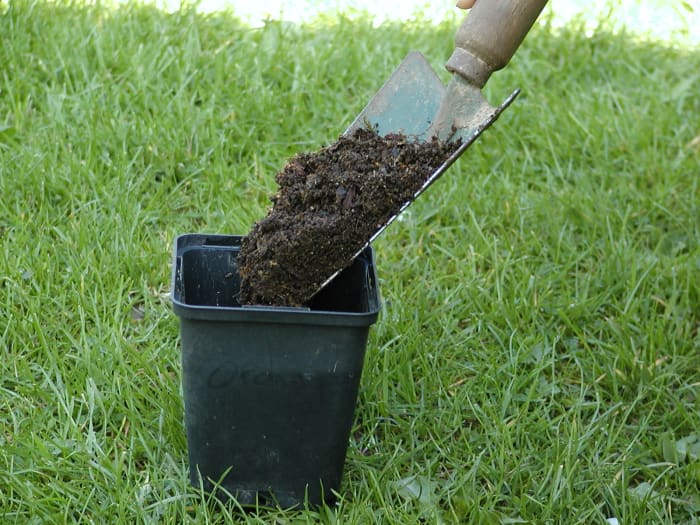
Fill some pots with potting compost or use your own homemade stuff like I did.
© Eugene Brennan
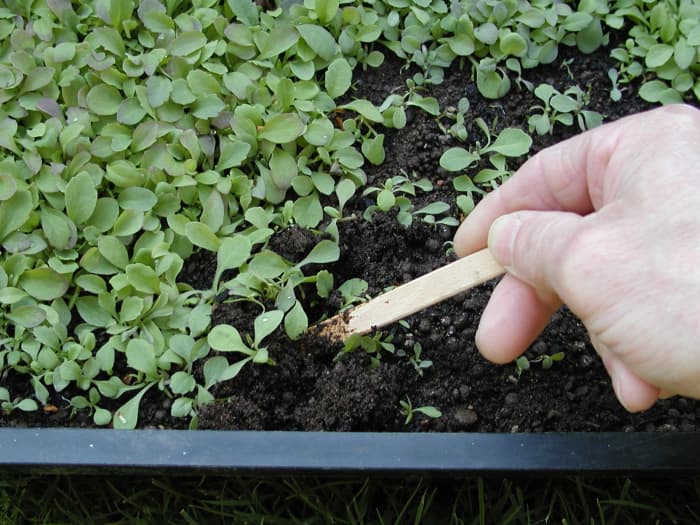
Tease out the seedlings. Pull sideways to disentangle the roots, rather than upwards which can snap the stems.
© Eugene Brennan
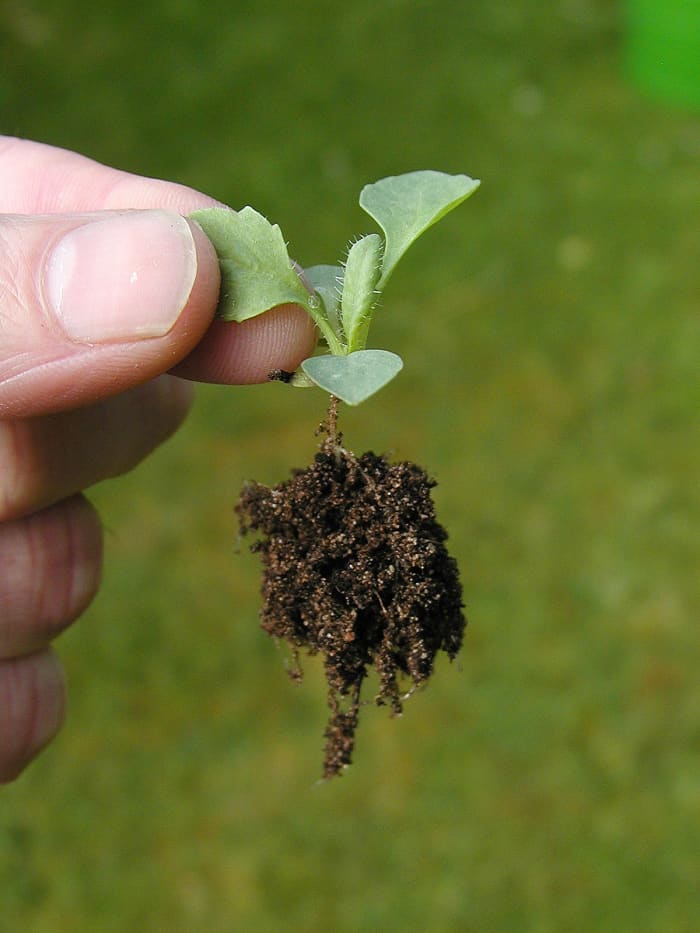
Try to leave as much of the compost stuck to the delicate roots as possible.
© Eugene Brennan
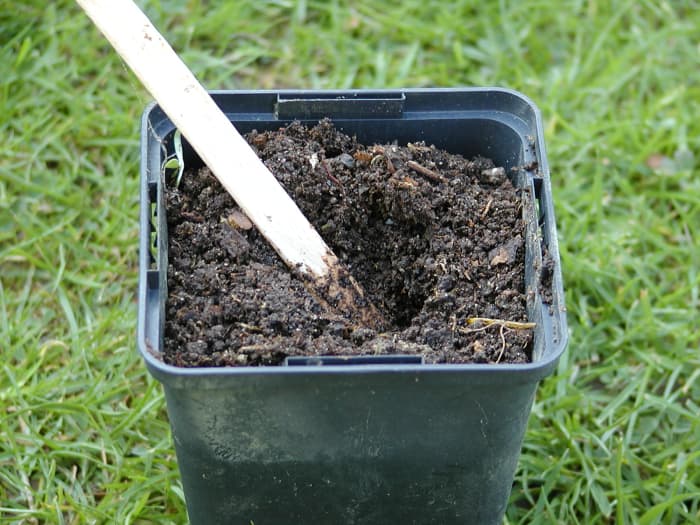
Make a hollow in the compost.
© Eugene Brennan
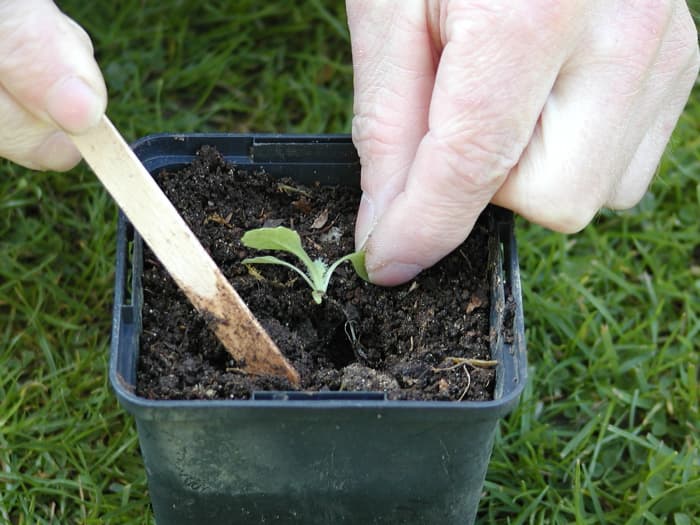
Drop the seedling into the hole and pull the compost back around the roots.
© Eugene Brennan
Step 9: Keep Transplanted Seedlings Out of Direct Sunlight While They Establish Roots
This is important if it's hot and sunny. If you didn't manage to keep a little piece of compost stuck to the roots and they were bare during transplanting, the exposed roots can dry out rapidly. So keep seedlings out of direct sunlight (but not in a dark or overly shaded spot) for a week until the roots grow into the new compost and have a better chance of absorbing moisture. In dull, overcast weather, you don't need to do this.
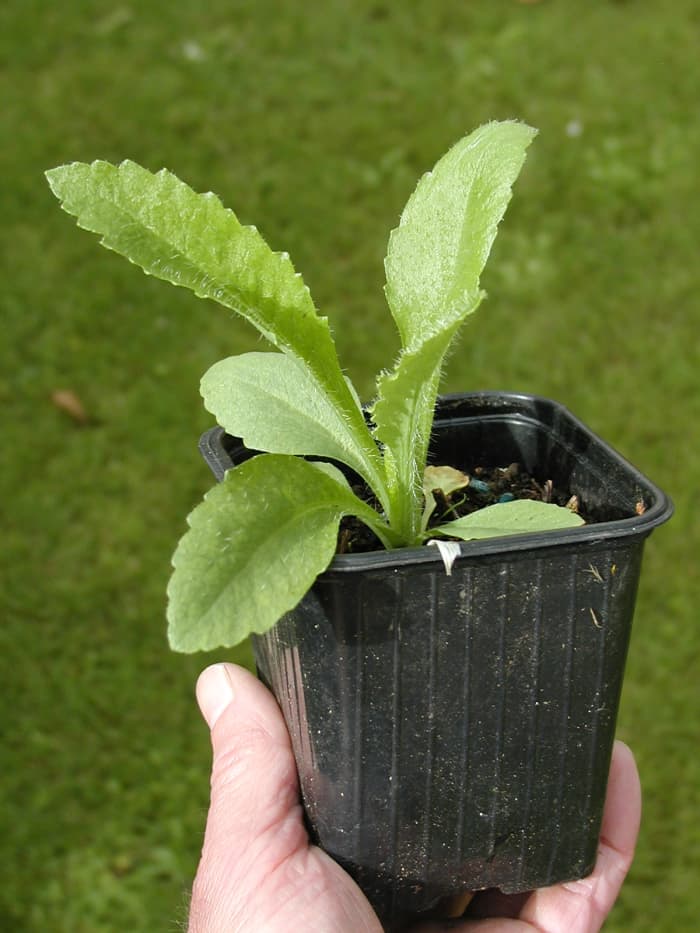
3 months since my poppy seeds were sown, plants have reached this size.
© Eugene Brennan
Step 10: Harden Off and Plant Out
Once plants have reached the stage where their roots are starting to emerge from the bottom of the pot, they can be planted out to their final location.
Hardening Off
Plants that have been grown inside need to be "hardened off" or slowly acclimated to the outdoors over a period of about seven to 10 days. Gradually introduce them to direct sunlight, dry air, and cold nights so that they don't suffer shock from the sudden change in growing conditions.
Plants can be hardened off by placing them in a wind- and sun-shaded spot outside, exposing them to these conditions for an hour a day, then taking them back inside at night. Extend the time gradually by an hour a day so that they become accustomed to lower temperatures. Start hardening off half-hardy annuals (e.g. marigolds, petunias, asters) shortly before the last frosts so plants are ready to plant out.
The poppies I sowed earlier in the year.
© Eugene Brennan
When Should Seeds Be Sown?
Sowing too early means that the plants are ready too soon and can get pot-bound before they can be planted out after frost has passed. Sowing too late means they don't flower until late in the season.
When to start seeds indoors:
- For hardy annuals, the best time is 8 to 10 weeks before the last frost (check frost guide for your zone).
- Half-hardy annuals, sow 6 to 8 weeks before the last frost. (In the UK, you can generally sow half-hardy annuals in Feb/Mar for planting out after hardening off in mid to late May when bad frosts are unlikely.)
When to sow seeds outdoors:
Hardy annuals can be sown outdoors in early spring when ground conditions allow.
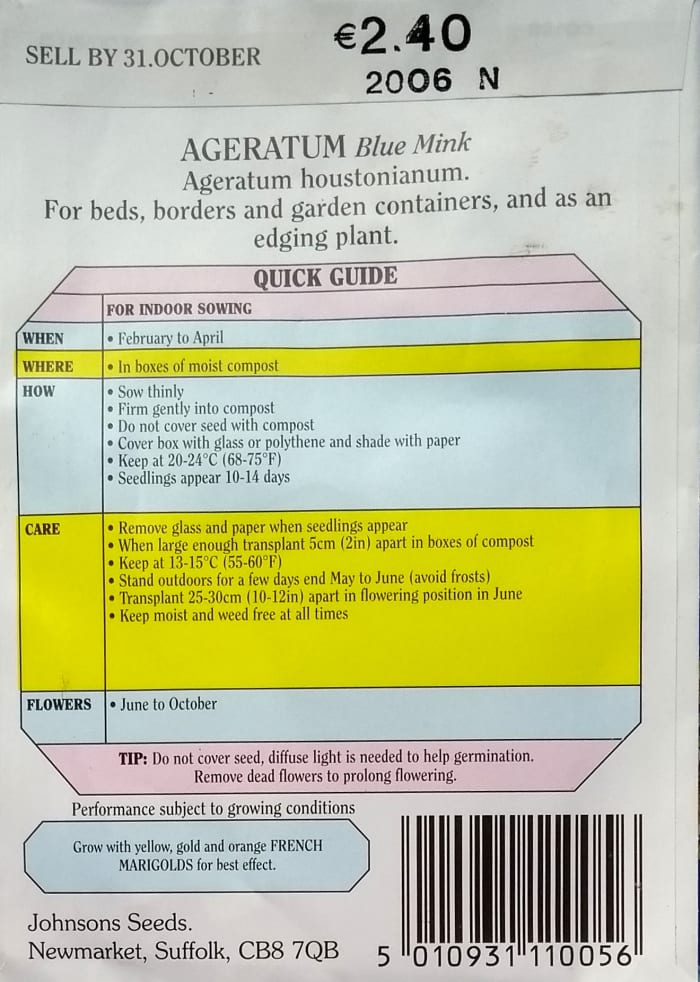
Seed packets give detailed info about when to sow, seed depth, germination temperature, flowering period and height.
© Eugene Brennan
What is Direct Sowing?
This is when you sow seeds directly in the ground in their final location rather than sowing them earlier indoors in containers and transplanting outside. The advantage is that young plants don't have to be transplanted, however on the downside, young seedlings can be swamped by weeds. You can kill weeds pre-sowing by using black plastic to cover ground in late winter and leaving it in place through early spring. Another technique called soil solarization involves laying clear plastic over the area you intend to sow on for 6 to 8 weeks during hot weather. Heat builds up under the plastic and kills weeds, along with some pests and pathogens.
How Do You Sow Seeds Outside?
You can sow seeds directly in the ground. This is often done with vegetable seeds or hardy annual flowers.
- Seeds should usually be sown in early spring as recommended on the packet.
- Dig the ground and turn over the sod to a depth of about 4 to 6 inches. This is best done before winter so it can be left for several months for frost to break up the soil. Alternatively, slice off the top inch of vegetation.
- Loosen soil with a fork or use a chopping motion with a spade to break it up.
- Rake the soil to a fine tilth so that it's fine and crumbly. Remove stones, weed debris, roots, sticks etc.
- Use a line as a guide if you're sowing vegetable seeds. This helps to keep things neat and makes it easier to walk between rows. If you're sowing flower seeds, you can scatter and rake them in rather than sowing in rows.
- Space the seeds and sow to the recommended depth. A rule of thumb is that depth should be three times the diameter of a seed. Press small seeds into the ground. If you've got lots of seed to spare, sow a few together at each spacing to maximise the chances of germination. You can thin and transplant excess seedlings later. If sowing large seeds, use a pencil, lollypop stick or similar to make a hole. Alternatively you can make a long furrow or groove in the ground and sow into this.
- Use a fine spray mist to moisten the ground.
- Thin seedlings once they germinate
What Does "Germination" Mean?
A seed is an embryonic plant in a capsule, with all the DNA information present to eventually develop into a full grown "adult". If the environmental conditions are right, a seed breaks out of its husk or shell and begins to grow. It sends a shoot upward to search for light and it also sends a root downwards, attracted by gravity. This process is known as germination.
How long do seeds last?
Seeds are dormant. This means that they do nothing and, in effect, are "asleep" as long as they are kept in a cool, dry place. Some seeds have a "best before date" in the sense that they will eventually deteriorate over time. However, some seeds can be stored for decades before they grow. In fact, the oldest known seed that was successfully germinated was from a date palm estimated to be 2000 years old. This was successfully grown in 2005.
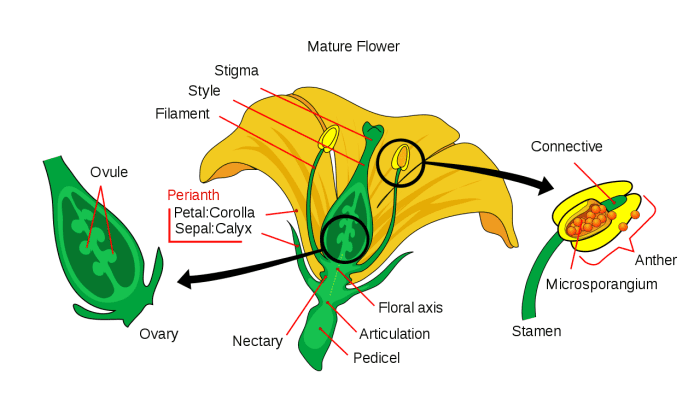
The reproductive parts of a flower. Embryonic seeds called ovules develop in the ovary, the plant equivalent of a womb.
Mariana Ruiz, public domain image via Wikipedia
What does a seed need to germinate?
Seeds have three major requirements for germination; water, oxygen and warmth (the temperature depends on the specific seed). Some seeds also require light but others require dark conditions.
Diagnosing Seedling Problems
- Leggy seedlings are the result of insufficient light after germination.
Solution: Move seedlings grown indoors as close as possible to a window as soon as they sprout. - Seedlings that are shriveled or toppled over is seen in cold, wet conditions that cause a damping off disease. Pathogens kill or weaken seeds pre-germination (or shortly afterwards).
Solution: Try to provide adequate light, heat and ventilation and avoid overwatering.
Seedlings can rapidly become spindly and leggy if they don't get enough light. Try and keep as close to a window as possible. Ideally place them on the window sill.
By permission Rahsaan Dawson on Facebook
Seedling with damping off disease. The root and lower stem have shriveled.
INAKAvillage211, CC BY SA 3.0
What Are Annuals, Biennials and Perennials?
- Annuals are plants that complete their growing cycle in one season between spring and fall (autumn).
- Half-hardy annuals are annuals that are tender and susceptible to frost. They need to be sown indoors in spring and planted out once the danger of severe frosts has passed.
- Biennials germinate and partially grow in size between spring or summer and fall. The next year they grow more foliage and finally flower.
- Perennials are plants that germinate and may flower the first season. They re-flower the next year and last indefinitely. Trees and shrubs are perennials as well as herbaceous plants (plants with soft green stems and not much wood). Heerbaceous plants often die down to ground level at the end of the year and sprout new foliage in spring.
What Flowers Are Easy to Grow From Seed?
Annuals:
- Sunflowers
- Candytuft
- Calendula.
- Cornflowers
- Annual poppies
Half-hardy annuals:
- Petunias
- Marigolds
- Lobelia
- Asters
Biennials:
- Wallflowers
- Canterbury Bells
- Foxgloves
Perennials:
- Delphiniums
- Aubretia
- Oriental poppies
- Lupins
For more info, see my guide:
20 Easy-to-Grow Flowers for Garden Colour
Assorted Vegetable Seed Packs
Ideal for kids who want to try growing their own veg, this seed assortment from Amazon should get them started! The 36 variety selection includes seeds for growing familiar vegetables such as carrots, onions and beans, along with more unusual items like gourds and papaya.
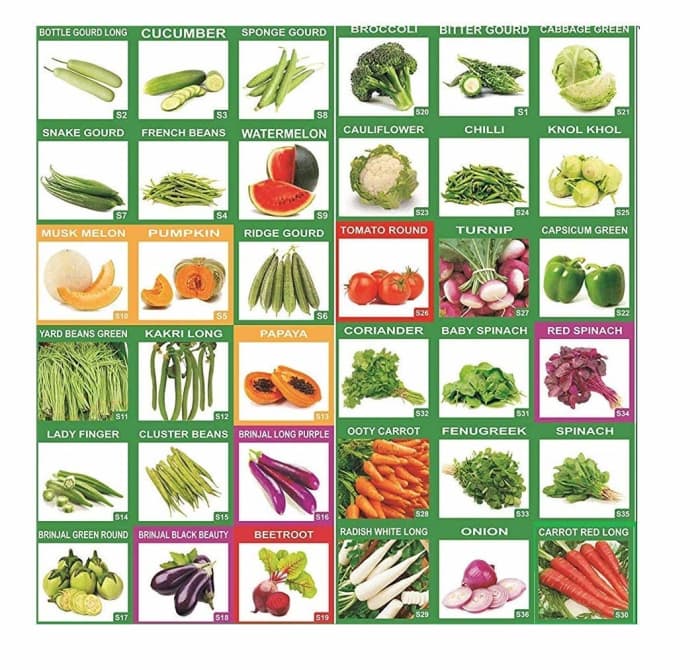
Vegetable seed assortment from Amazon
Amazon
Wildflower Seed Mixtures
This wildflower seeds pack from Amazon is great value. The packet consists of 16 individual species of wildflowers. Popular favorites such as Black-Eyed Susan, Purple coneflower, Columbine, White Yarrow & More! Contains 100% pure live seed, no fillers or inert matter. Seeds are non-GMO and very easy to germinate. Ideal for a wild corner of the garden and great for attracting bees and butterflies. Height ranges from 12 to 48 inches tall.
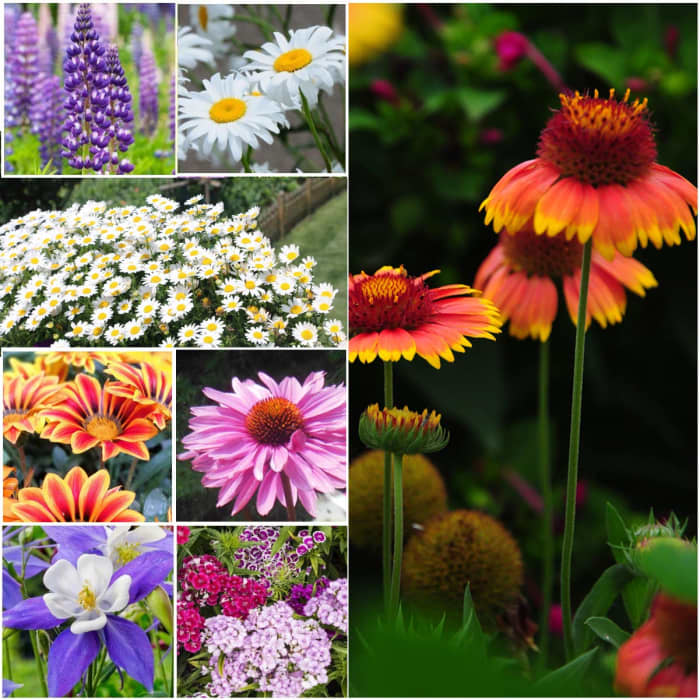
Wildflower seeds pack from Amazon
Amazon
Propagating Plants From Cuttings
Some flowers, shrubs or trees are difficult to grow from seed because of the length of time or strict conditions required for germination. So sometimes it's easier to make new plants by taking cuttingst. You can read all about it in my other guide, 7 Easy Steps to Taking Plant Cuttings.
Why grow from cuttings instead of seeds?
The advantage of growing from cuttings is that the new plant is like a clone and genetically identical to the plant it came from. Plants grown from seeds don't necessarily "breed true" and, just like humans, can look somewhat differently to either of their parents, because they share DNA from both of them. Also it takes longer for a plant to grow from seed.
You May Also Like
Gardening For Beginners: 8 Easy Steps to Planting a Tree or Shrub
References
Last frost in the UK
When to Expect Your Last Spring Freeze (US)
This content is accurate and true to the best of the author's knowledge and is not meant to substitute for formal and individualized advice from a qualified professional.
Questions & Answers
Question: I germinated some seeds on a paper towel. Do I plant the seedling with the pod down or the shot down?
Answer: The shoot should point upwards and the root downwards. Even if they don't and the germinated seed is planted "upside down" and before leaves appear, the shoot and root eventually reorientate themselves. So a shoot will turn around and travel upwards towards the light and the root will detect gravity and grow downwards.
Question: The seed packets sold in stores are dated. Do the seeds really "expire" after the date?
Answer: It's probably an estimate assuming that moisture in seeds, combined with bacteria and molds will eventually lead to their demise if they aren't given the opportunity to germinate. However, I've never really checked packets to see whether the expiry date on some is further into the future than on others. Everything now seems to have an expiry date, so maybe the seed packers are just covering themselves to avoid people complaining about seeds not germinating. Apparently keeping seeds in the fridge prevents them attempting to germinate and then failing and dying when there's no growing medium present, so that may extend the lifespan. Some seeds have a very long lifespan, perhaps hundreds of years. If you have a packet which has gone past the expiry date, all you can really do is sow them and see what happens!
Question: I've bought soil for bean seeds. They have shoots now, and two to three leaves. When is the appropriate time should I put in fertilizer?
Answer: You can give the seedlings a liquid feed from now on. Usually, it's best to use one-quarter to one-half strength solution, but consult the instructions on the pack to see whether it needs to be weaker. Feed once a week, and use plain water if necessary between feedings. Once the seedlings are planted, you can use one half to full strength solution, every week or so. If you're using granular fertiliser, don't let it come in contact with leaves or stems, as it can burn. Too much fertiliser can cause seedlings to grow too fast and become spindly. If this is happening, ease off on application (spindly seedlings are also the result of lack of sufficient light).
Question: I've planted strawberry seeds. They are in my home, on a table. I water them twice a day, but after 1 week, not even one has sprouted. What should I do?
Answer: You shouldn't need to water them everyday unless you kitchen is very warm and the compost dries out. Remember, the surface may be dry but wet under the surface. Wet compost can cause the seeds to go mouldy and die. Compost only needs to be moist. It's a good idea to cover with a piece of card, plastic, glass or wood to stop the surface drying out. It's recommended to just press the seeds into the compost and they can take several weeks to germinate. Some strawberry seeds also need to be stratifieed or exposed to cold winter conditions to encourage them to germinate.
Have a look at this link.
https://strawberryplants.org/strawberry-seeds/
Question: How do seeds grow?
Answer: Basically, a seed is like an embryo, the plant equivalent of a fertilised human egg, with genetic information from both parents. A seed is dormant in the absence of warmth and water, but once it's sown and detects moisture (it also needs oxygen and heat), it begins to metamorphosise into an adult plant. This involves using instructions in the DNA in its cells on how to grow roots, stems, leaves, and flowers.
Question: Is it ok to grow the seeds at home? How big should the container be? Should I leave it by the window with it open for some oxygen?
Answer: Yes, anyone can grow seeds at home, it's really easy.
The container size depends on how many seeds you want to sow. If you're going to sow lots as I did in the photo above, a tray, box or tin is best. If you only want to sow a few seeds, you can use a flower pot, yogurt carton, plastic cup, food container (wash it out first) or anything similar. Seed trays are usually about 1 1/2 inch / 40 mm deep, so seedlings need to be transplanted when they're tiny so that their roots have a chance to spread out and get bigger. If you use a deeper box, flower pot or container, you can allow the seedlings to get much bigger before transplanting.
You don't need to leave seeds near an open window to get oxygen! Oxygen is all around us. In fact, it makes up 19% of the air. And it'll also permeate down through the seed compost to reach the seeds. Seeds should be kept in a warm place at a temperature of at least 18 degrees C (64 F). Once they germinate, they need to be moved to a window, bright conservatory, etc. so they can grow properly. In dim light, seedlings rapidly become straggly as the stems grow long and thin as the plant searches for light.
Question: How deep should seeds be planted?
Answer: Tiny seeds can be sprinkled on the surface and not covered. It can help to press them down into the compost or spray with a mister after sowing. Larger seeds above about a mm (1/16") in size can be covered with a light sprinkling of compost. Much larger seeds, e.g. peas, beans, sunflower seeds etc can be pushed down about 6mm (1/4") below the surface of the compost if it's soft. In harder ground outdoors, you can use a stick or piece of rod to make a hole and drop the seed into it, or sow in drills which are slots made in the ground with a rake or pointed tool.
Question: When transplanting seedlings to thin them out, if they are tall and straggly do you plant them deeper into the new hole to stop them becoming too leggy?
Answer: No, it's better to keep the stem above the ground/compost or maybe slightly lower to cover any delicate roots, otherwise it can potentially be damaged by soil borne diseases. As the seedlings grow bigger, cover any exposed roots. It's important to expose young plants to light as early as possible to avoid them becoming straggly. If you're growing inside, get them as close as possible to a window or onto the sill and turn daily. Don't over water young seedlings. More plants are drowned by the roots being wet or killed by fungi in warm moist conditions than from drought. Compost should be slightly moist, not wet (stick your finger down into it to test, as it can dry out on the surface giving the appearance that it's dry throughout). Good ventilation is also important to avoid fungal diseases such as botrytis (grey mould).
Question: Do seed sowing instructions work for vegetables?
Answer: Yes, but some seeds don't like being transplanted, mostly root crop vegetables such as carrots, turnips, and parsnips. These can be sown directly into the ground. Pre-soaking hard seeds such as peas and beans for 12 hours, reduces the time needed for germination. Plants that have been started indoors should be gradually hardened off by placing them in the wind shaded spot, exposing them to outdoor conditions for a couple of hours a day, then taking them back inside at night. Extend the time gradually so that they become accustomed to lower temperatures.
Question: Do sunflower seeds need darkness to germinate?
Answer: It doesn't seem to matter. You can cover the seeds or leave them uncovered. When growing small seeds that are near the surface, it's often better to cover the seed tray/container to stop the seed compost from drying out in strong sunshine.
Question: What is the proper depth for sowing seeds?
Answer: It depends on the size of the seed. Dust like seeds shouldn't be covered and sprinkled on the surface and kept moist. Seeds the size of grains of sugar should be covered with a fine sprinkling of a couple of mm of compost. Larger seeds, e.g., marigold seeds need about 5mm/1/4 inch of cover and very large seeds, e.g., beans need to be sown about 1/2 inches or 12 mm deep.
© 2014 Eugene Brennan
KikiKing on June 17, 2020:
I want to plant these seeds I received and the instructions for them is a little unclear it says that I need to blister the seeds over night what the heck does that mean? Can someone help me with this problem
Eugene Brennan (author) from Ireland on June 17, 2020:
Hi Donald,
According to Thompson & Morgan Seeds, dahlia seeds should be covered with a 3mm layer of sifted compost. Gardener's World recommend pushing the seeds into compost (Push the pointy end in).
DONALD SSTIENS on June 14, 2020:
I WANT TO TRY DAHLIA SEDS, MY QUESTION IS SHOULD I PLACE THE SEEDS ON TOP OF MOIST POTTING MIX AND PRESS THEM INTO POTTING MIX AND LIGHTLY COVER SEEDS OR DO NOT COVER SEEDS?.
Eugene Brennan (author) from Ireland on April 26, 2020:
Hi Barbara. It's best to check the seed packets. Some seeds can be sown now, but for others it's a bit late and they may not flower this season. It depends on your location also, how far north you are and your climate. In general in the Northern Hemisphere (say New York, UK) for annual plants, seed is sown February to March for flowering in summer. Biennials (e.g. wallflowers, Canterbury bells, foxgloves) can be sown now to flower next year. You can of course sow perennial seeds, and they'll flower next year at least. I notice in the photo of a seed packet in the article, they say sow indoors Feb to April, but these were for a UK market.
Barbara on April 26, 2020:
Hi I just bought A wooden plant Box with Glass opening on top it my first time to plant seed when best time to start putting seeds in tray and in to glass box thank you
Vren Humphris on April 24, 2020:
Thank you for the most informative article I've ever read. I live in South Africa.
rebecca amoroso santiago on April 05, 2020:
thank you for the information and guide in planting different vegetable seeds
Eugene Brennan (author) from Ireland on November 07, 2019:
When you sow the seeds, you can moisten them with a mister spray. Then keep covered to retain moisture until they germinate. After that, moisten as needed (check just under the surface with your finer to see if it feels moist). Don't water regularly.
Unn Gledje on November 07, 2019:
Hello, thank you for this helpful article.
Do you water the seed at all before it germinates? And how often a day do you water from germination up to transplant?
Gu lu on April 17, 2019:
It's so interesting this page.
Eugene Brennan (author) from Ireland on April 14, 2019:
Edit: Check the seed packet or Google for germination temperature. Typically this is 18 C / 64 F min, but some seeds need higher temps and others can cope with lower values.
Eugene Brennan (author) from Ireland on April 14, 2019:
Hi Lois,
The toilet roll cores might disintegrate over time as they soak up water, so tell the kids not to be over enthusiastic watering them! They might last ok though. You'll need to stuff something in the end to stop the compost/soil falling out, maybe pieces of toilet paper, rolled up into a ball. Potting soil will be quite loose until it's moistened. Alternatively you could use small yoghurt pots, disposable coffee cups or similar as containers. The dollar store potting soil should be fine, just break up any lumps before using it and moisten before and after sowing seed.
As regard seed types, you could try sunflowers, beans and peas (soak overnight before sowing), sweet corn, pop corn kernels (not sure whether they sterilize this before it's sold, but it would be interesting to experiment sowing it), squash and pumpkin, zinnias, nasturtiums. Marigolds are also easy to grow and the seeds easy enough to handle (about 1/4" / 5 to 7mm).
The top of a fridge wouldn't be warm. Heat rises from the coils at the back, but there wouldn't be anything to support the rolls unless there's a grating, but don't completely cover it or the fridge mightn't cool properly! Cover as you suggest with cling film and prick a few holes in the the film over each roll. Maybe put them on a window sill, radiator or near where the heat source is for the room. Once seeds germinate, it's important to move them as close as possible to a window within a day or so as they can rapidly become tall and spindly. It might be a good idea to sow a few seeds at least in each roll to allow for non-germination (then either discard or thin) and maybe have some spare rolls with seeds sown in them also as backup if there's total germination failure (to avoid disappointment if the kids all have their own rolls!) Repot when the seedlings start to get too big for the rolls (You'll know this because compost will dry out faster and you'll see roots coming out the bottom).
Lois Burgess on April 14, 2019:
Hi Eugene,
I am going to be doing a library program this Tuesday with kids ages 7-12. We are going to be using empty toilet paper rolls as seed pots to start growing seeds inside. I have never done this so am looking for some tips and feedback. What flower seed would you recommend? I am looking for a bigger seed so the kids don't have to do thinning. I also bought some potting soil from our dollar store. It contains peat moss and perlite. Would this be good enough? Would it be good to put the seed pots on top of a refrigerator where it is warm to germinate? Is it best to cover them with cling wrap to act as a greenhouse? Do you need to put holes in the cling wrap to let the air in? We live in Nova Scotia, Canada so we won't be able to plant them outside for at least 6-7 weeks, so how soon would we have to repot them? I want to make a simple instruction sheet the kids can take home to follow. Thanks so much, Eugene for the great article!!
Eugene Brennan (author) from Ireland on March 27, 2019:
Thanks Joi!
Joi, Maryland on March 26, 2019:
One word, Fabulous! My youngest, 6 yr. old son and I are excited to follow these well written, pict. perfect directions....... we'll keep you posted....
Mbalou on March 20, 2019:
Love this so much
trinity on December 04, 2018:
thanks eugene i love how you gave details to you website, this is awesome i'm going to show it to my friends and family thanks again.
Eugene Brennan (author) from Ireland on August 31, 2018:
Thanks Kimberly! Glad you liked it and found it useful!
Kimberly Lake from California on August 30, 2018:
Great detail. Thank your for the pictures and clear instructions. I love to do this with the kids, especially sunflowers.
Andre on April 28, 2018:
Thanks for the great tutorial! Looking to grow some herbs with the kids and teach them how to grow. This was more than perfect, thank you!
Daniel on March 16, 2018:
Thank you for the information, I've recently been saved by our Lord Jesus. And feel that he's calling me into a discipleship, Anyway I was researching on an effective way of planting seeds being the Word and couldn't believe how remarkable this reminded me of my own experience. Thanks again! Peace and love to all.
Bob Webster on August 27, 2017:
Thank you,you make it look so simple,i'm definitely going for it
Yo hey whoa on May 24, 2017:
Pretty good. I have planted so many herbs and flowers thanks.
Eugene Brennan (author) from Ireland on May 09, 2017:
Hi Anna,
You can transplant from trays when the plants have a couple of pairs of true leaves. If you sowed seeds in pots, you can let the plants get somewhat bigger and transplant when the roots start to poke out through the drainage holes in the pots. Alternatively slip the plants out of the pots and if the roots have spread throughout the compost (as in the photo above), then it's time to give them more space. You don't need to trim any leaves.
Hope this helps!
Anna Carlson on May 09, 2017:
Thanks Eugene, I just received a greenhouse for my birthday and am struggling to know when to transplant to bigger pots before planting in the garden. I have done all what you said and now have plants that I needed to put into bigger pots. I guess I am wondering when to transplant into bigger pots and should I trim off the litte starter leaves?
RAGAVIN on February 22, 2017:
Excellent !!!!
Eugene Brennan (author) from Ireland on March 29, 2016:
Thank you Roberta!
RTalloni on March 29, 2016:
Congrats your Hub of the Day award for this neat post on growing plants from seeds. You've made it easy for the least knowledgeable person to have success in starting a little (or big) garden from seed.
Eugene Brennan (author) from Ireland on March 29, 2016:
Thanks Susan! Lots of growth here also as it becomes milder. Spring is my favourite part of the gardening year!
Susan Deppner from Arkansas USA on March 29, 2016:
Excellent tutorial! Good timing for Hub of the Day (congratulations!) as our planting and growing season is gearing up quickly. Time to go get my hands dirty!
Eugene Brennan (author) from Ireland on March 29, 2016:
Hi Kyra! Covering the tray keeps seeds moist, but the covering, if its opaque, blocks light. I have always sown seeds and kept them in dark conditions pre-germination, but I think its seed specific, and some seeds need sunshine as an essential element for germination. So its best to check the germination requirements on the packet or Google the flower/vegetable to see what the story is. I've tweeted some of the major seed suppliers to get more info on this.
Eugene Brennan (author) from Ireland on March 29, 2016:
Thanks Kristen! I had planned to grow some tomatoes this year, instead of buying them in a store. I need to get cracking now and sow the seeds plus clear out the greenhouse which has been sadly neglected for the last few years! It's hard to get around to doing everything!
Kyra on March 29, 2016:
I was surprised at "cover the seed tray". I thought it needed all the elements to grow - including sunshine.
Kristen Howe from Northeast Ohio on March 29, 2016:
Eugene, this is great hub and just in the nick of time for spring, Beautiful photos and easy instructions to grow and sow seeds for your own home. I'm getting ready to start prepping my container patio garden at my apartment this April. Congrats on HOTD!
Eugene Brennan (author) from Ireland on March 29, 2016:
Thanks a million Chitrangada! Hopefully it will help those who have absolutely no knowledge of gardening and want to learn the basics!
Chitrangada Sharan from New Delhi, India on March 29, 2016:
Congratulations for the HOTD!
Very useful hub with step by step instructions on sowing seeds. The pictures are particularly helpful. Even if one is already doing gardening, your hub provides some very useful tips and suggestions.
Thanks for sharing--pinning it!
Eugene Brennan (author) from Ireland on May 14, 2015:
Thanks a million Susan! Producing plants from seeds is quited tedious but of course more economical. Just watch out for slugs when the seedlings are small! If you go to the trouble of growing from seed, its worthwhile growing perennials which regrow every year.
Susan Deppner from Arkansas USA on May 14, 2015:
Hopefully I'll be doing more gardening using seeds in the future, so this article will be very helpful. Pinned to my gardening board (and followed you while I was there, by the way). Thanks for sharing good gardening advice!
Cynthia Zirkwitz from Vancouver Island, Canada on June 30, 2014:
Ah, Eugbug, the abundance of the wise and generous!
Eugene Brennan (author) from Ireland on June 29, 2014:
Thank you techygran! I now have loads of these poppies potted but no room left in my garden to plant them. Looks like I'll have to give them all away!
Cynthia Zirkwitz from Vancouver Island, Canada on June 29, 2014:
What a great review and instructions! I am going to share this online, but also with my granddaughters!
Eugene Brennan (author) from Ireland on April 18, 2014:
Thanks Kim for the comments! I just added another photo. These seedlings are getting to the stage where they badly need transplanting into pots (If I can get the time to do it!)
Kim Smith on April 18, 2014:
Good suggestions. Very interesting. Your pictures are so simple, anyone can do it.
Eugene Brennan (author) from Ireland on March 08, 2014:
Thanks Beth! Many seeds are easy to grow, once the basic principles as shown above are followed. Hopefully these seeds will grow and I will have more photos later.
Beth Eaglescliffe on March 07, 2014:
This article is full of useful advice for new gardeners. The photos are just right and help to get the information across clearly. Great hub, voted up.
mecheshier on March 07, 2014:
You are most welcome. Thanks for the great post! :-)
Eugene Brennan (author) from Ireland on March 07, 2014:
Thanks a lot! Glad you liked it and thanks for the fan mail!
mecheshier on March 07, 2014:
Fabulous post. I love your suggestions for starting seed. Voted up!
How To Plant Seeds In My Garden?
Source: https://dengarden.com/gardening/How-to-Sow-Seeds
Posted by: stevensonablents.blogspot.com
0 Response to "How To Plant Seeds In My Garden?"
Post a Comment